Leaflet笔记-把leaflet-tilelayer-wmts移植到vue cli中(含思路)-程序员宅基地
技术标签: web前端 GIS Web相关技术 vue cli Leaflet
目录
前言
关于leaflet的webpackage使用npm安装官方是有明显的解析
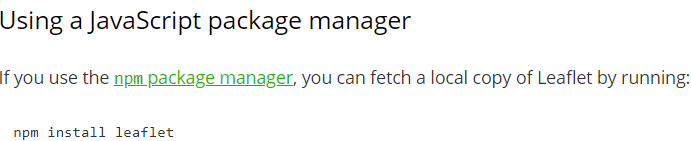
但是关于插件特别是TileLayer.WMTS是不提供的,但提供了源码,可以稍微修改下,就能在vue cli中使用,在此记录下,这个经验很有用,方便自己以后查阅。
过程
先把leaflet下载下来
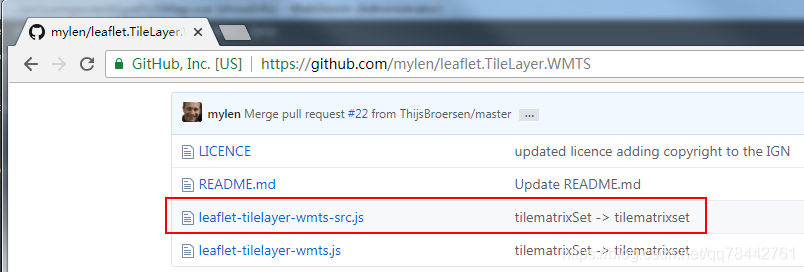
npm install leaflet把leaflet.TileLayer.WMTS的Github中把leaflet-tilelayer-wmts-src.js的源码拷贝下!
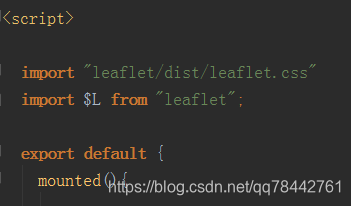
安装好后在vue中引用:
拷贝后,把源码修改为:
      /***
       * 插件移植开始
       */

      $L.TileLayer.WMTS = $L.TileLayer.extend({
        defaultWmtsParams: {
          service: 'WMTS',
          request: 'GetTile',
          version: '1.0.0',
          layer: '',
          style: '',
          tilematrixset: '',
          format: 'image/jpeg'
        },

        initialize: function (url, options) { // (String, Object)
          this._url = url;
          var lOptions= {};
          var cOptions = Object.keys(options);
          cOptions.forEach(element=>{
            lOptions[element.toLowerCase()]=options[element];
          });
          var wmtsParams = $L.extend({}, this.defaultWmtsParams);
          var tileSize = lOptions.tileSize || this.options.tileSize;
          if (lOptions.detectRetina && $L.Browser.retina) {
            wmtsParams.width = wmtsParams.height = tileSize * 2;
          } else {
            wmtsParams.width = wmtsParams.height = tileSize;
          }
          for (var i in lOptions) {
            // all keys that are in defaultWmtsParams options go to WMTS params
            if (wmtsParams.hasOwnProperty(i) && i!="matrixIds") {
              wmtsParams[i] = lOptions[i];
            }
          }
          this.wmtsParams = wmtsParams;
          this.matrixIds = options.matrixIds||this.getDefaultMatrix();
          $L.setOptions(this, options);
        },

        onAdd: function (map) {
          this._crs = this.options.crs || map.options.crs;
          $L.TileLayer.prototype.onAdd.call(this, map);
        },

        getTileUrl: function (coords) { // (Point, Number) -> String
          var tileSize = this.options.tileSize;
          var nwPoint = coords.multiplyBy(tileSize);
          nwPoint.x+=1;
          nwPoint.y-=1;
          var sePoint = nwPoint.add(new $L.Point(tileSize, tileSize));
          var zoom = this._tileZoom;
          var nw = this._crs.project(this._map.unproject(nwPoint, zoom));
          var se = this._crs.project(this._map.unproject(sePoint, zoom));
          var tilewidth = se.x-nw.x;
          var ident = this.matrixIds[zoom].identifier;
          var tilematrix = this.wmtsParams.tilematrixset + ":" + ident;
          var X0 = this.matrixIds[zoom].topLeftCorner.lng;
          var Y0 = this.matrixIds[zoom].topLeftCorner.lat;
          var tilecol=Math.floor((nw.x-X0)/tilewidth);
          var tilerow=-Math.floor((nw.y-Y0)/tilewidth);
          var url = $L.Util.template(this._url, {s: this._getSubdomain(coords)});
          return url + $L.Util.getParamString(this.wmtsParams, url) + "&tilematrix=" + tilematrix + "&tilerow=" + tilerow +"&tilecol=" + tilecol;
        },

        setParams: function (params, noRedraw) {
          $L.extend(this.wmtsParams, params);
          if (!noRedraw) {
            this.redraw();
          }
          return this;
        },

        getDefaultMatrix : function () {
          /**
           * the matrix3857 represents the projection
           * for in the IGN WMTS for the google coordinates.
           */
          var matrixIds3857 = new Array(22);
          for (var i= 0; i<22; i++) {
            matrixIds3857[i]= {
              identifier    : "" + i,
              topLeftCorner : new $L.LatLng(20037508.3428,-20037508.3428)
            };
          }
          return matrixIds3857;
        }
      });

      $L.tileLayer.wmts = function (url, options) {
        return new $L.TileLayer.WMTS(url, options);
      };


      /***
       * 插件移植结束
        */
其实就是把L改成了$L,这样就可以访问了!
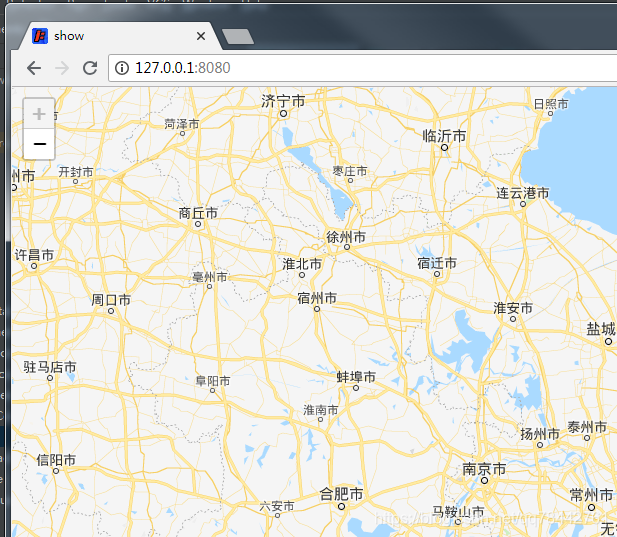
这里把JSMap.vue贴一下
<template>
    <div>
      <div id="map">
      </div>
    </div>
</template>

<script>

  import "leaflet/dist/leaflet.css"
  import $L from "leaflet";

  export default {
    mounted(){

      /***
       * 插件移植开始
       */

      $L.TileLayer.WMTS = $L.TileLayer.extend({
        defaultWmtsParams: {
          service: 'WMTS',
          request: 'GetTile',
          version: '1.0.0',
          layer: '',
          style: '',
          tilematrixset: '',
          format: 'image/jpeg'
        },

        initialize: function (url, options) { // (String, Object)
          this._url = url;
          var lOptions= {};
          var cOptions = Object.keys(options);
          cOptions.forEach(element=>{
            lOptions[element.toLowerCase()]=options[element];
          });
          var wmtsParams = $L.extend({}, this.defaultWmtsParams);
          var tileSize = lOptions.tileSize || this.options.tileSize;
          if (lOptions.detectRetina && $L.Browser.retina) {
            wmtsParams.width = wmtsParams.height = tileSize * 2;
          } else {
            wmtsParams.width = wmtsParams.height = tileSize;
          }
          for (var i in lOptions) {
            // all keys that are in defaultWmtsParams options go to WMTS params
            if (wmtsParams.hasOwnProperty(i) && i!="matrixIds") {
              wmtsParams[i] = lOptions[i];
            }
          }
          this.wmtsParams = wmtsParams;
          this.matrixIds = options.matrixIds||this.getDefaultMatrix();
          $L.setOptions(this, options);
        },

        onAdd: function (map) {
          this._crs = this.options.crs || map.options.crs;
          $L.TileLayer.prototype.onAdd.call(this, map);
        },

        getTileUrl: function (coords) { // (Point, Number) -> String
          var tileSize = this.options.tileSize;
          var nwPoint = coords.multiplyBy(tileSize);
          nwPoint.x+=1;
          nwPoint.y-=1;
          var sePoint = nwPoint.add(new $L.Point(tileSize, tileSize));
          var zoom = this._tileZoom;
          var nw = this._crs.project(this._map.unproject(nwPoint, zoom));
          var se = this._crs.project(this._map.unproject(sePoint, zoom));
          var tilewidth = se.x-nw.x;
          var ident = this.matrixIds[zoom].identifier;
          var tilematrix = this.wmtsParams.tilematrixset + ":" + ident;
          var X0 = this.matrixIds[zoom].topLeftCorner.lng;
          var Y0 = this.matrixIds[zoom].topLeftCorner.lat;
          var tilecol=Math.floor((nw.x-X0)/tilewidth);
          var tilerow=-Math.floor((nw.y-Y0)/tilewidth);
          var url = $L.Util.template(this._url, {s: this._getSubdomain(coords)});
          return url + $L.Util.getParamString(this.wmtsParams, url) + "&tilematrix=" + tilematrix + "&tilerow=" + tilerow +"&tilecol=" + tilecol;
        },

        setParams: function (params, noRedraw) {
          $L.extend(this.wmtsParams, params);
          if (!noRedraw) {
            this.redraw();
          }
          return this;
        },

        getDefaultMatrix : function () {
          /**
           * the matrix3857 represents the projection
           * for in the IGN WMTS for the google coordinates.
           */
          var matrixIds3857 = new Array(22);
          for (var i= 0; i<22; i++) {
            matrixIds3857[i]= {
              identifier    : "" + i,
              topLeftCorner : new $L.LatLng(20037508.3428,-20037508.3428)
            };
          }
          return matrixIds3857;
        }
      });

      $L.tileLayer.wmts = function (url, options) {
        return new $L.TileLayer.WMTS(url, options);
      };


      /***
       * 插件移植结束
        */

      const ign = new $L.TileLayer.WMTS( "http://XXX.XXX.XXX.XXX:8080/geoserver/gwc/service/wmts" ,
        {
          layer: 'GG_9:gg_9',
          tilematrixset: "EPSG:900913",
          Format : 'image/png',
          TileMatrix: 'EPSG:900913:8'
        }
      );

      const map = $L.map('map', {
        minZoom: 4,
        maxZoom: 7
      }).setView([32, 118], 7);


      $L.control.scale({'position':'bottomleft','metric':true,'imperial':false}).addTo(map);

      map.addLayer(ign);

      map.invalidateSize(true);
    }
  }
</script>

<style>

  #map {
    width: 800px;
    height: 800px;
  }

  .chart{
    width: 600px;
    height: 300px;
    background-color: #fff;
  }
</style>
智能推荐
AVFrame&AVPacket_天天av-程序员宅基地
文章浏览阅读1.5w次。AVFrame:( This structure describes decoded (raw) audio or video data. AVFrame must be allocated using av_frame_alloc(). Note that this only allocates the AVFrame itself, the buffers for the data mus_天天av
Java经典例题07:用100元人民币兑换10元、5元、1元的纸币_编程把100元换成1元5元10元-程序员宅基地
文章浏览阅读3.5k次,点赞2次,收藏12次。解题思路分析:1.100元兑换10元纸币,可以兑换10张,但每种纸币都要有,所以最多只能兑换9张,最少兑换1张。则初始值为1;循环条件小于10或者小于等于9。2.100元兑换5元纸币,可以兑换20,但每种纸币都要有,所以最多只能兑换19张,最少兑换1张。初始值为1;循环条件小于20或者小于等于19。3.100元兑换1元纸币,可以兑换100张,但每种纸币都要有,所以最多只能兑换99张,最少兑换1张。则初始值为1;循环条件小于100或者小于等于99。_编程把100元换成1元5元10元
猜三次年龄_找人猜三次年龄-程序员宅基地
文章浏览阅读450次。1、允许用户最多尝试三次2、每尝试三次后,如果还没猜对,就问用户是否继续玩,如果回答Y,y,就继续猜三次,以此往复,如果回答N,n,就直接退出times=0count=3while times<=3:age=int(input(‘请输入年龄:’))if age == 18:print(‘猜对了’)breakelif age > 18:print(‘猜大了’)else:print(‘猜小了’)times+=1if times3:choose = input(‘继续猜Y_找人猜三次年龄
SDOI2017 Round2 详细题解-程序员宅基地
文章浏览阅读152次。这套题实在是太神仙了。。做了我好久。。。好多题都是去搜题解才会的 TAT。剩的那道题先咕着,如果省选没有退役就来填吧。「SDOI2017」龙与地下城题意丢 \(Y\) 次骰子,骰子有 \(X\) 面,每一面的概率均等,取值为 \([0, X)\) ,问最后取值在 \([a, b]\) 之间的概率。一个浮点数,绝对误差不超过 \(0.013579\) 为正确。数据范围每组数据有 \...
嵌入式数据库-Sqlite3-程序员宅基地
文章浏览阅读1.1k次,点赞36次,收藏25次。阅读引言: 本文将会从环境sqlite3的安装、数据库的基础知识、sqlite3命令、以及sqlite的sql语句最后还有一个完整的代码实例, 相信仔细学习完这篇内容之后大家一定能有所收获。
C++ Builder编写WinForm从Web服务器下载文件-程序员宅基地
文章浏览阅读51次。UnicodeString templateSavePath = ChangeFileExt(ExtractFilePath(Application->ExeName),"tmp.doc");IdAntiFreeze1->OnlyWhenIdle = false;//设置使程序有反应.TMemoryStream *templateStream ;templateStre..._c++webserver下载文件
随便推点
JAVA小项目潜艇大战_java潜艇大战-程序员宅基地
文章浏览阅读8.3k次,点赞10次,收藏41次。一、第一天1、创建战舰、侦察潜艇、鱼雷潜艇、水雷潜艇、水雷、深水炸弹类完整代码:package day01;//战舰public class Battleship { int width; int height; int x; int y; int speed; int life; void move(){ System.out.println("战舰移动"); }}package day01;//侦察潜艇_java潜艇大战
02表单校验的基本步骤-程序员宅基地
文章浏览阅读940次。表单校验的基本步骤_表单校验
libOpenBlas.dll缺失依赖解决办法-程序员宅基地
文章浏览阅读4.5k次。libOpenBlas.dll缺失依赖解决办法 intellij idea 1.dll文件缺失依赖,报错:“找不到指定模块”2.下载depends查看dll缺失文件3.下载缺失依赖libopenblas.dll出错起因由于java web项目需要调用openBlas库来进行运算,就下载了预编译的libopenblas文件进行调用,首先遇到路径出错问题、之后又是dll文件缺失依赖问题,以下是解决..._libopenblas.dll
Swoole 实践篇之结合 WebSocket 实现心跳检测机制-程序员宅基地
文章浏览阅读251次,点赞3次,收藏10次。这里实现的心跳检测机制是一个基础版的,心跳包的主要作用是用于检测用户端是否存活,有助于我们及时判断用户端是否存在断线的问题。在我之前开发过的项目中,有一个基于物联网在线直播抓娃娃的项目,其中就有需要实时监控设备在线状态的需求,该需求就是使用心跳包来实现的。实际上心跳检测技术,应用更广泛的是实时通信、或设备管理的场景偏多。
Maven dependency scope_maven dependent scope-程序员宅基地
文章浏览阅读714次。Dependency scope is used to limit the transitivity of a dependency, and also to affect the classpath used for various build tasks.There are 6 scopes available:compileThis is the default scop_maven dependent scope
TCP头部结构信息_tcp头部包含哪些信息-程序员宅基地
文章浏览阅读3.6k次。TCP 头部结构信息_tcp头部包含哪些信息