springBoot+Cache(自定义有效时间配置)_springboot整合springcache自定义指定过期时间-程序员宅基地
技术标签: spring boot java SpringBoot redis
一、背景
sprinbBoot的cache是不是支持动态设置缓存注解的,因此本次自己实现一个可以动态设置缓存时间的配置。
源码:示例地址
二、步骤
1、pom.xml添加依赖配置
        <dependency>
            <groupId>org.springframework.boot</groupId>
            <artifactId>spring-boot-starter-data-redis</artifactId>
            <version>2.7.0</version>
        </dependency>
        <dependency>
            <groupId>com.fasterxml.jackson.core</groupId>
            <artifactId>jackson-databind</artifactId>
            <version>2.13.0</version>
        </dependency>
2、application.properties配置文件的配置
spring.application.name=springboot_cache
#缓存前缀统一
spring.redis.key.prefix=SPRINGBOOT_CACHE
#redis的配置
spring.cache.type=redis
spring.data.redis.host=localhost
spring.data.redis.jedis.pool.enabled=true
spring.data.redis.jedis.pool.max-active=8
spring.data.redis.jedis.pool.max-idle=8
spring.data.redis.jedis.pool.max-wait=3000ms
spring.data.redis.jedis.pool.min-idle=20
spring.data.redis.port=6379
spring.data.redis.timeout=3000ms
3、自定义一个RedisCacheManager
自定义的类继承org.springframework.data.redis.cache.RedisCacheManager。
package com.example.springboot_cache.config;

import lombok.SneakyThrows;
import org.springframework.data.redis.cache.RedisCache;
import org.springframework.data.redis.cache.RedisCacheConfiguration;
import org.springframework.data.redis.cache.RedisCacheManager;
import org.springframework.data.redis.cache.RedisCacheWriter;

import java.time.Duration;

public class CustomRedisCacheManager extends RedisCacheManager {


    public CustomRedisCacheManager(RedisCacheWriter cacheWriter, RedisCacheConfiguration defaultCacheConfiguration) {

        super(cacheWriter, defaultCacheConfiguration);
    }

    @SneakyThrows
    @Override
    protected RedisCache createRedisCache(String name, RedisCacheConfiguration cacheConfiguration){

        if(!name.isEmpty() && name.contains(":")){

            String[] spelStr = name.split(":");
            String key = spelStr[0];
            String valueStr = spelStr[1];
            int cycleTime = Integer.parseInt(valueStr.substring(0, 1));
            String cycleUnit = valueStr.substring(1, 2);

            if(cycleUnit.equals("D")){
    //表示天
                return super.createRedisCache(key, cacheConfiguration.entryTtl(Duration.ofDays(cycleTime)));
            }
            if(cycleUnit.equals("H")){
    //表示小时
                return super.createRedisCache(key, cacheConfiguration.entryTtl(Duration.ofHours(cycleTime)));
            }
            if(cycleUnit.equals("M")){
    //表示分钟
                return super.createRedisCache(key, cacheConfiguration.entryTtl(Duration.ofMinutes(cycleTime)));
            }
            if(cycleUnit.equals("S")){
    //表示秒
                return super.createRedisCache(key, cacheConfiguration.entryTtl(Duration.ofSeconds(cycleTime)));
            }else{

                throw new Exception("未识别的有效缓存时间单位");
            }
        }
        return super.createRedisCache(name, cacheConfiguration);

    }
}
4、使用自定义的RedisCacheManager覆盖springBoot的RedisCacheManager
package com.example.springboot_cache.config;

import com.fasterxml.jackson.annotation.JsonAutoDetect;
import com.fasterxml.jackson.annotation.JsonTypeInfo;
import com.fasterxml.jackson.annotation.PropertyAccessor;
import com.fasterxml.jackson.databind.DeserializationFeature;
import com.fasterxml.jackson.databind.ObjectMapper;
import com.fasterxml.jackson.databind.jsontype.impl.LaissezFaireSubTypeValidator;
import org.springframework.beans.factory.annotation.Value;
import org.springframework.context.annotation.Bean;
import org.springframework.context.annotation.Configuration;
import org.springframework.data.redis.cache.RedisCacheConfiguration;
import org.springframework.data.redis.cache.RedisCacheManager;
import org.springframework.data.redis.cache.RedisCacheWriter;
import org.springframework.data.redis.connection.RedisConnectionFactory;
import org.springframework.data.redis.core.RedisTemplate;
import org.springframework.data.redis.serializer.Jackson2JsonRedisSerializer;
import org.springframework.data.redis.serializer.RedisSerializationContext;
import org.springframework.data.redis.serializer.StringRedisSerializer;

@Configuration
public class RedisConfig {


    @Value("${spring.redis.key.prefix}")
    private String keyPreFix;

    /**
     * redis序列化方式
     * @param factory
     * @return
     */
    @Bean
    public RedisTemplate redisTemplate(RedisConnectionFactory factory){

        //指定Jackson2JsonRedisSerializer为Object的序列化器,替代redis默认的序列化器JdkSerializationRedisSerializer
        Jackson2JsonRedisSerializer jackson2JsonRedisSerializer = new Jackson2JsonRedisSerializer(Object.class);
        RedisTemplate<Object, Object> redisTemplate = new RedisTemplate<>();
        redisTemplate.setConnectionFactory(factory);

        ObjectMapper objectMapper = new ObjectMapper();
        //注意:enableDefaultTyping方法已过期
//        objectMapper.enableDefaultTyping(ObjectMapper.DefaultTyping.NON_FINAL, JsonTypeInfo.As.PROPERTY);
        //扩展知识:JsonTypeInfo.As属性认知
        //JsonTypeInfo.As.PROPERTY:作为数据的兄弟属性
        //JsonTypeInfo.As.EXISTING_PROPERTY:作为POJO中已经存在的属性
        //JsonTypeInfo.As.EXTERNAL_PROPERTY:作为扩展属性
        //JsonTypeInfo.As.WRAPPER_OBJECT:作为一个包装的对象
        //JsonTypeInfo.As.WRAPPER_ARRAY:作为一个包装的数组

        objectMapper.activateDefaultTyping(LaissezFaireSubTypeValidator.instance,
                ObjectMapper.DefaultTyping.NON_FINAL, JsonTypeInfo.As.PROPERTY);
        //反序列化时智能识别变量名(识别没有按驼峰格式命名的变量名)
        objectMapper.setVisibility(PropertyAccessor.ALL, JsonAutoDetect.Visibility.ANY);
        //反序列化如果有多的属性,不抛出异常
        objectMapper.configure(DeserializationFeature.FAIL_ON_UNKNOWN_PROPERTIES, false);
        //反序列化如果碰到不识别的枚举值,是否作为空值解释,true:不会抛不识别的异常, 会赋空值,false:会抛不识别的异常
        objectMapper.configure(DeserializationFeature.READ_UNKNOWN_ENUM_VALUES_AS_NULL, true);

        jackson2JsonRedisSerializer.setObjectMapper(objectMapper);
        redisTemplate.setValueSerializer(jackson2JsonRedisSerializer);
        redisTemplate.setKeySerializer(new StringRedisSerializer());
        redisTemplate.afterPropertiesSet();

        return redisTemplate;

    }


    /*
     * @description Redis缓存的序列化方式使用redisTemplate.getValueSerializer(),不在使用JDK默认的序列化方式
     * @param redisTemplate
     * @return RedisCacheManager
     **/
    @Bean
    public RedisCacheManager redisCacheManager(RedisTemplate redisTemplate) {

        RedisCacheWriter redisCacheWriter = RedisCacheWriter.nonLockingRedisCacheWriter(redisTemplate.getConnectionFactory());
        RedisCacheConfiguration redisCacheConfiguration = RedisCacheConfiguration.defaultCacheConfig()
                .serializeValuesWith(RedisSerializationContext.SerializationPair.fromSerializer(redisTemplate.getValueSerializer()))
                //使用prefixCacheNameWith需要注意系统自动拼接的双”:“问题
                .computePrefixWith(cacheName -> keyPreFix  + ":" + cacheName + ":")
                .serializeKeysWith(RedisSerializationContext.SerializationPair.fromSerializer(redisTemplate.getKeySerializer()));
        //return new RedisCacheManager(redisCacheWriter, redisCacheConfiguration);
        return new CustomRedisCacheManager(redisCacheWriter, redisCacheConfiguration);
    }
}
三、注解测试
1、定义一个service, 写三个方法,分别测试以下四个加粗注解
| 对象 | 功能 |
|---|---|
| Cache | 缓存接口,定义缓存操作。实现:RedisCache,EnCacheCache等 |
| CacheManager | 缓存管理器,管理各种缓存(Cache)组件 |
| @Cacheable | 主要针对方法配置,能够根据方法的请求参数对其结果进行缓存 |
| @CacheEvict | 清空缓存 |
| @CachePut | 保证方法被调用,又希望结果被缓存。 |
| @EnableCaching | 开启基于注解的缓存 |
| keyGenerator | 缓存数据时key生成策略 |
| serialize | 缓存数据时value序列化策略 |
代码:
package com.example.springboot_cache.service;

import com.example.springboot_cache.entity.User;
import lombok.extern.slf4j.Slf4j;
import org.springframework.beans.BeanUtils;
import org.springframework.cache.annotation.CacheEvict;
import org.springframework.cache.annotation.CachePut;
import org.springframework.cache.annotation.Cacheable;
import org.springframework.stereotype.Component;
import org.springframework.util.Assert;

import java.util.ArrayList;
import java.util.List;
import java.util.Optional;

@Slf4j
@Component
public class UserService {


    private static List<User> userList =  new ArrayList<>();

    static{

        userList.add(new User("张三",33, 1));
        userList.add(new User("李四",30, 2));
        userList.add(new User("王五",28, 3));
        userList.add(new User("赵六",22, 4));

    }

    //添加缓存
    @Cacheable(value = "user:5M", key = "#userId")
    public User getUser(Integer userId){

        log.info("没使用缓存...");
        Optional<User> first = userList.stream().filter(u -> u.getId() == userId).findFirst();
        if(first.isPresent()){

            return first.get();
        }
        return null;
    }

    //清除缓存
    @CacheEvict(value = "user", key = "#user.id")
    public void update(User user) throws Exception {

        Assert.notNull(user, "the param user cannot be null");
        Assert.notNull(user.getId(), "the param user.id cannot be null");
        Optional<User> first = userList.stream().filter(u -> u.getId() == user.getId()).findFirst();
        if(first.isPresent()){

            User user1 = first.get();
            BeanUtils.copyProperties(user, user1);
        }else{

            throw new Exception("未查询到用户");
        }
    }

    //更新缓存
    @CachePut(value = "user", key = "#result.id")
    public User updateNameByUserId(String name, Integer userId) throws Exception {

        Assert.notNull(name, "the param user cannot be null");
        Assert.notNull(userId, "the param user.id cannot be null");
        Optional<User> first = userList.stream().filter(u -> u.getId() == userId).findFirst();
        if(first.isPresent()){

            User user1 = first.get();
            user1.setName(name);
            return user1;
        }else{

            throw new Exception("未查询到用户");
        }
    }

}
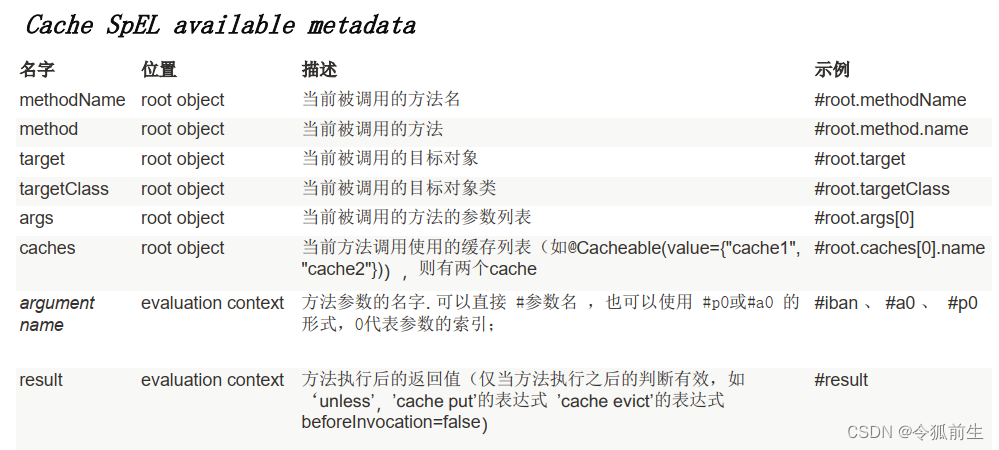
说明: 缓存数据使用的 key,支持使用 Spel 表达式
使用SPEL表达式:#userId 是参数 userId 的值 ,#result.id标识结果值返回的id。
Spel 表达式如下:
2、启动类启动springboot的cache
启动类上加上注解@EnableCaching
package com.example.springboot_cache;

import org.springframework.boot.SpringApplication;
import org.springframework.boot.autoconfigure.SpringBootApplication;
import org.springframework.cache.annotation.EnableCaching;

@SpringBootApplication
@EnableCaching
public class SpringbootCacheApplication {


    public static void main(String[] args) {

        SpringApplication.run(SpringbootCacheApplication.class, args);
    }

}
3、写一个controller, 分别调用service的三个方法。
package com.example.springboot_cache.controller;

import com.example.springboot_cache.entity.User;
import com.example.springboot_cache.service.UserService;
import org.springframework.beans.factory.annotation.Autowired;
import org.springframework.web.bind.annotation.*;

@RestController
@RequestMapping(value = "user/")
public class UserController {


    @Autowired
    private UserService userService;

    @GetMapping(value = "{userId}")
    public User queryUserById(@PathVariable Integer userId){

        return userService.getUser(userId);
    }

    @PostMapping(value = "update")
    public void update(@RequestBody User user) throws Exception {

        userService.update(user);
    }

    @PutMapping(value = "updateName/{userId}")
    public User updateNameByUserId(@RequestParam(name = "userName") String userName, @PathVariable Integer userId) throws Exception {

        return userService.updateNameByUserId(userName, userId);
    }
}
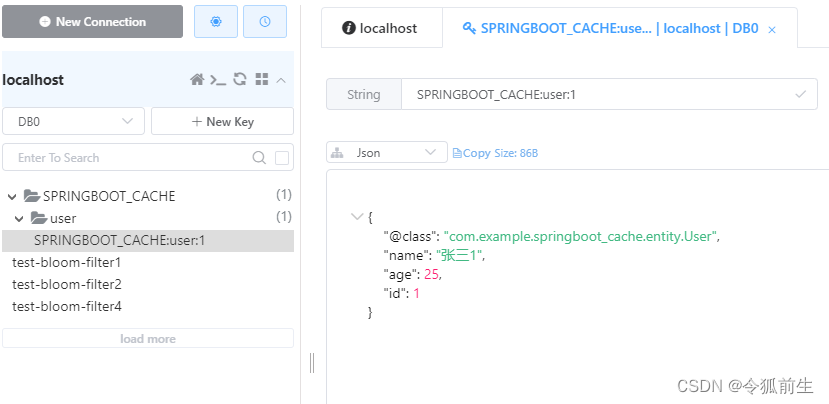
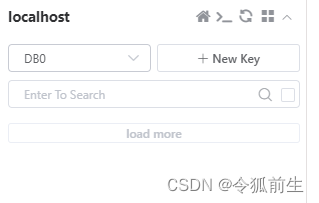
3.1、查询请求
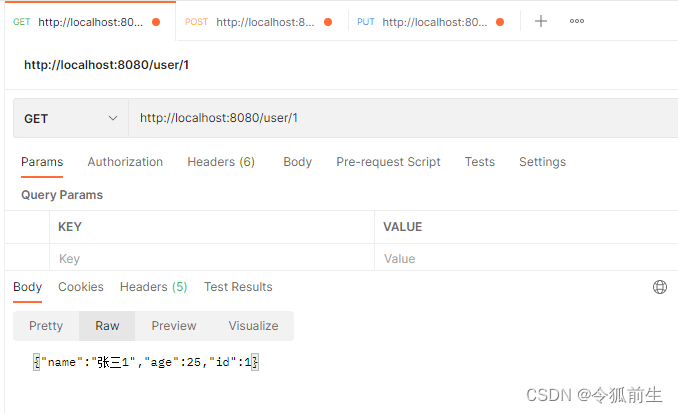
请求后redis:
3.2、清除缓存请求
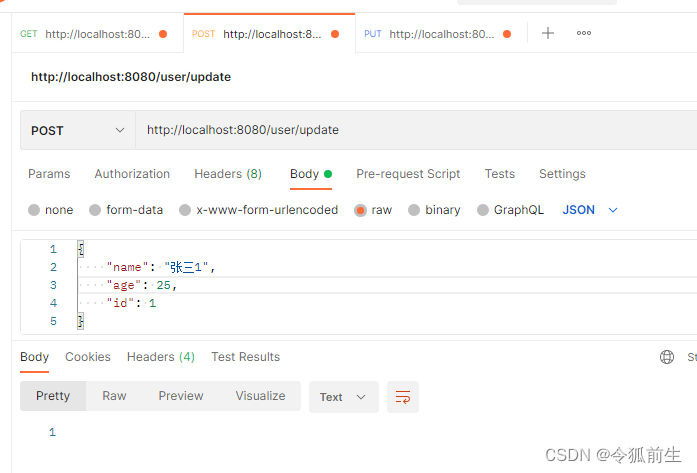
请求后redis:
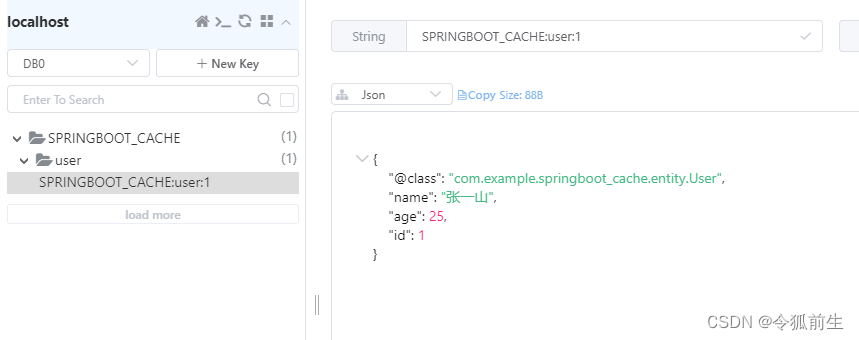
3.3、更新缓存请求
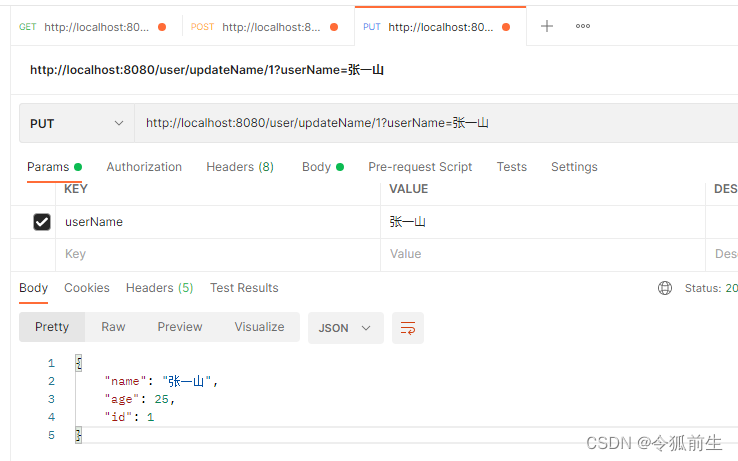
请求后redis:
四、Spring boot Cache原理
第一步、自动配置类;
自动启动类:CacheAutoConfiguration
属性配置:CacheProperties
主启动类添加:@EnableCaching注解
cache POM添加:
<dependency>
  <groupId>org.springframework.boot</groupId>
  <artifactId>spring-boot-starter-cache</artifactId>
  <version>${spring-boot-cache.version}<version>
</dependency>
第二步、从缓存的配置类 中获取 多个cache
CacheConfigurationImportSelector.selectImports()方法获取
static class CacheConfigurationImportSelector implements ImportSelector {


    @Override
    public String[] selectImports(AnnotationMetadata importingClassMetadata) {

      CacheType[] types = CacheType.values();
      String[] imports = new String[types.length];
      for (int i = 0; i < types.length; i++) {

        imports[i] = CacheConfigurations.getConfigurationClass(types[i]);
      }
      return imports;
    }

}
获取结果:SimpleCacheConfiguration 默认cache
 org.springframework.boot.autoconfigure.cache.GenericCacheConfiguration
  org.springframework.boot.autoconfigure.cache.JCacheCacheConfiguration
  org.springframework.boot.autoconfigure.cache.EhCacheCacheConfiguration
  org.springframework.boot.autoconfigure.cache.HazelcastCacheConfiguration
  org.springframework.boot.autoconfigure.cache.InfinispanCacheConfiguration
  org.springframework.boot.autoconfigure.cache.CouchbaseCacheConfiguration
  org.springframework.boot.autoconfigure.cache.RedisCacheConfiguration
  org.springframework.boot.autoconfigure.cache.CaffeineCacheConfiguration
  org.springframework.boot.autoconfigure.cache.GuavaCacheConfiguration
  org.springframework.boot.autoconfigure.cache.SimpleCacheConfiguration【默认】
  org.springframework.boot.autoconfigure.cache.NoOpCacheConfiguration
第三步:SimpleCacheConfiguration.cacheManager()
此方法中给容器中注册了一个CacheManager组件:类型为ConcurrentMapCacheManager
@Bean
public ConcurrentMapCacheManager cacheManager() {

  ConcurrentMapCacheManager cacheManager = new ConcurrentMapCacheManager();
  List<String> cacheNames = this.cacheProperties.getCacheNames();
  if (!cacheNames.isEmpty()) {

   cacheManager.setCacheNames(cacheNames);
  }
  return this.customizerInvoker.customize(cacheManager);
}
第四步:查看获取缓存方法getCache()
ConcurrentMapCacheManager 类里,数据都存储到为ConcurrentMap 中
public Cache getCache(String name) {

  Cache cache = this.cacheMap.get(name); //cacheMap 为ConcurrentMap 类型,获取一个cache组件
  if (cache == null && this.dynamic) {

   synchronized (this.cacheMap) {

     cache = this.cacheMap.get(name); //cahceMap不为空获取
     if (cache == null) {

      //可以获取或者创建ConcurrentMapCache类型的缓存组件;他的作用将数据保存在ConcurrentMap中;
      cache = createConcurrentMapCache(name);
      this.cacheMap.put(name, cache); //ConcurrentMapCache.lookup();
     }
   }
  }
  return cache;
}
五、Cacheable运行流程
1、方法运行之前,先去查询Cache(缓存组件),按照cacheNames指定的名字获取; (CacheManager先获取相应的缓存),第一次获取缓存如果没有Cache组件会自动创建。
2、去Cache中查找缓存的内容(ConcurrentMapCache.lookup()方法中去查找),使用一个key,默认就是方法的参数; key是按照某种策略生成的;默认是使用keyGenerator生成的,默认使用SimpleKeyGenerator生成key; SimpleKeyGenerator生成key的默认策略; 如果没有参数;key=new SimpleKey(); 如果有一个参数:key=参数的值 如果有多个参数:key=new SimpleKey(params);
 //这个方法 SimpleKeyGenerator.generateKey()  方法生成key
public static Object generateKey(Object... params) {

  if (params.length == 0) {

   return SimpleKey.EMPTY;
  }
  if (params.length == 1) {
     //如果只有一个参数,直接返回这个参数为key
   Object param = params[0];
   if (param != null && !param.getClass().isArray()) {

     return param;
   }
  }
  return new SimpleKey(params);
}
3、没有查到缓存就调用目标方法;
4、将目标方法返回的结果,放进缓存中ConcurrentMapCache.put();
SimpleKey(params);
 //这个方法 SimpleKeyGenerator.generateKey()  方法生成key
public static Object generateKey(Object... params) {

  if (params.length == 0) {

   return SimpleKey.EMPTY;
  }
  if (params.length == 1) {
     //如果只有一个参数,直接返回这个参数为key
   Object param = params[0];
   if (param != null && !param.getClass().isArray()) {

     return param;
   }
  }
  return new SimpleKey(params);
}
3、没有查到缓存就调用目标方法;
4、将目标方法返回的结果,放进缓存中ConcurrentMapCache.put();
@Cacheable标注的方法执行之前先来检查缓存中有没有这个数据,默认按照参数的值作为key去查询缓存, 如果没有就运行方法并将结果放入缓存;以后再来调用就可以直接使用缓存中的数据;
参考文章:
1、[springboot学习笔记]SpringBoot缓存机制
2、Springboot-cache原理与源码
智能推荐
oracle 12c 集群安装后的检查_12c查看crs状态-程序员宅基地
文章浏览阅读1.6k次。安装配置gi、安装数据库软件、dbca建库见下:http://blog.csdn.net/kadwf123/article/details/784299611、检查集群节点及状态:[root@rac2 ~]# olsnodes -srac1 Activerac2 Activerac3 Activerac4 Active[root@rac2 ~]_12c查看crs状态
解决jupyter notebook无法找到虚拟环境的问题_jupyter没有pytorch环境-程序员宅基地
文章浏览阅读1.3w次,点赞45次,收藏99次。我个人用的是anaconda3的一个python集成环境,自带jupyter notebook,但在我打开jupyter notebook界面后,却找不到对应的虚拟环境,原来是jupyter notebook只是通用于下载anaconda时自带的环境,其他环境要想使用必须手动下载一些库:1.首先进入到自己创建的虚拟环境(pytorch是虚拟环境的名字)activate pytorch2.在该环境下下载这个库conda install ipykernelconda install nb__jupyter没有pytorch环境
国内安装scoop的保姆教程_scoop-cn-程序员宅基地
文章浏览阅读5.2k次,点赞19次,收藏28次。选择scoop纯属意外,也是无奈,因为电脑用户被锁了管理员权限,所有exe安装程序都无法安装,只可以用绿色软件,最后被我发现scoop,省去了到处下载XXX绿色版的烦恼,当然scoop里需要管理员权限的软件也跟我无缘了(譬如everything)。推荐添加dorado这个bucket镜像,里面很多中文软件,但是部分国外的软件下载地址在github,可能无法下载。以上两个是官方bucket的国内镜像,所有软件建议优先从这里下载。上面可以看到很多bucket以及软件数。如果官网登陆不了可以试一下以下方式。_scoop-cn
Element ui colorpicker在Vue中的使用_vue el-color-picker-程序员宅基地
文章浏览阅读4.5k次,点赞2次,收藏3次。首先要有一个color-picker组件 <el-color-picker v-model="headcolor"></el-color-picker>在data里面data() { return {headcolor: ’ #278add ’ //这里可以选择一个默认的颜色} }然后在你想要改变颜色的地方用v-bind绑定就好了,例如:这里的:sty..._vue el-color-picker
迅为iTOP-4412精英版之烧写内核移植后的镜像_exynos 4412 刷机-程序员宅基地
文章浏览阅读640次。基于芯片日益增长的问题,所以内核开发者们引入了新的方法,就是在内核中只保留函数,而数据则不包含,由用户(应用程序员)自己把数据按照规定的格式编写,并放在约定的地方,为了不占用过多的内存,还要求数据以根精简的方式编写。boot启动时,传参给内核,告诉内核设备树文件和kernel的位置,内核启动时根据地址去找到设备树文件,再利用专用的编译器去反编译dtb文件,将dtb还原成数据结构,以供驱动的函数去调用。firmware是三星的一个固件的设备信息,因为找不到固件,所以内核启动不成功。_exynos 4412 刷机
Linux系统配置jdk_linux配置jdk-程序员宅基地
文章浏览阅读2w次,点赞24次,收藏42次。Linux系统配置jdkLinux学习教程,Linux入门教程(超详细)_linux配置jdk
随便推点
matlab(4):特殊符号的输入_matlab微米怎么输入-程序员宅基地
文章浏览阅读3.3k次,点赞5次,收藏19次。xlabel('\delta');ylabel('AUC');具体符号的对照表参照下图:_matlab微米怎么输入
C语言程序设计-文件(打开与关闭、顺序、二进制读写)-程序员宅基地
文章浏览阅读119次。顺序读写指的是按照文件中数据的顺序进行读取或写入。对于文本文件,可以使用fgets、fputs、fscanf、fprintf等函数进行顺序读写。在C语言中,对文件的操作通常涉及文件的打开、读写以及关闭。文件的打开使用fopen函数,而关闭则使用fclose函数。在C语言中,可以使用fread和fwrite函数进行二进制读写。 Biaoge 于2024-03-09 23:51发布 阅读量:7 ️文章类型:【 C语言程序设计 】在C语言中,用于打开文件的函数是____,用于关闭文件的函数是____。
Touchdesigner自学笔记之三_touchdesigner怎么让一个模型跟着鼠标移动-程序员宅基地
文章浏览阅读3.4k次,点赞2次,收藏13次。跟随鼠标移动的粒子以grid(SOP)为partical(SOP)的资源模板,调整后连接【Geo组合+point spirit(MAT)】,在连接【feedback组合】适当调整。影响粒子动态的节点【metaball(SOP)+force(SOP)】添加mouse in(CHOP)鼠标位置到metaball的坐标,实现鼠标影响。..._touchdesigner怎么让一个模型跟着鼠标移动
【附源码】基于java的校园停车场管理系统的设计与实现61m0e9计算机毕设SSM_基于java技术的停车场管理系统实现与设计-程序员宅基地
文章浏览阅读178次。项目运行环境配置:Jdk1.8 + Tomcat7.0 + Mysql + HBuilderX(Webstorm也行)+ Eclispe(IntelliJ IDEA,Eclispe,MyEclispe,Sts都支持)。项目技术:Springboot + mybatis + Maven +mysql5.7或8.0+html+css+js等等组成,B/S模式 + Maven管理等等。环境需要1.运行环境:最好是java jdk 1.8,我们在这个平台上运行的。其他版本理论上也可以。_基于java技术的停车场管理系统实现与设计
Android系统播放器MediaPlayer源码分析_android多媒体播放源码分析 时序图-程序员宅基地
文章浏览阅读3.5k次。前言对于MediaPlayer播放器的源码分析内容相对来说比较多,会从Java-&amp;gt;Jni-&amp;gt;C/C++慢慢分析,后面会慢慢更新。另外,博客只作为自己学习记录的一种方式,对于其他的不过多的评论。MediaPlayerDemopublic class MainActivity extends AppCompatActivity implements SurfaceHolder.Cal..._android多媒体播放源码分析 时序图
java 数据结构与算法 ——快速排序法-程序员宅基地
文章浏览阅读2.4k次,点赞41次,收藏13次。java 数据结构与算法 ——快速排序法_快速排序法