Conclusions about Deep Learning with Python
Last night, I start to learn the python for deep learning research. It really confused me at the beginning. So, here is some conclusions about the hard beginning progress. If you have some more excellent solutions, please let us know (you can leave a message in the bottom of this poster). Thank you.
1. The first problem I met is how to load images using python and change the image format to some specific requirements ?
here is what I searched from online: python 读取并显示图片的两种方法 . I think its a goog tutorial about this problem.


  1 一、matplotlib
  2 1. 显示图片
  3 复制代码
  4 import matplotlib.pyplot as plt # plt 用于显示图片
  5 import matplotlib.image as mpimg # mpimg 用于读取图片
  6 import numpy as np
  7
  8 lena = mpimg.imread('lena.png') # 读取和代码处于同一目录下的 lena.png
  9 # 此时 lena 就已经是一个 np.array 了,可以对它进行任意处理
 10 lena.shape #(512, 512, 3)
 11
 12 plt.imshow(lena) # 显示图片
 13 plt.axis('off') # 不显示坐标轴
 14 plt.show()
 15 复制代码
 16 2. 显示某个通道
 17 复制代码
 18 # 显示图片的第一个通道
 19 lena_1 = lena[:,:,0]
 20 plt.imshow('lena_1')
 21 plt.show()
 22 # 此时会发现显示的是热量图,不是我们预想的灰度图,可以添加 cmap 参数,有如下几种添加方法:
 23 plt.imshow('lena_1', cmap='Greys_r')
 24 plt.show()
 25
 26 img = plt.imshow('lena_1')
 27 img.set_cmap('gray') # 'hot' 是热量图
 28 plt.show()
 29
 30 复制代码
 31 3. 将 RGB 转为灰度图
 32 matplotlib 中没有合适的函数可以将 RGB 图转换为灰度图,可以根据公式自定义一个:
 33
 34 复制代码
 35 def rgb2gray(rgb):
 36     return np.dot(rgb[...,:3], [0.299, 0.587, 0.114])
 37
 38 gray = rgb2gray(lena)
 39 # 也可以用 plt.imshow(gray, cmap = plt.get_cmap('gray'))
 40 plt.imshow(gray, cmap='Greys_r')
 41 plt.axis('off')
 42 plt.show()
 43 复制代码
 44 4. 对图像进行放缩
 45 这里要用到 scipy
 46
 47 复制代码
 48 from scipy import misc
 49 lena_new_sz = misc.imresize(lena, 0.5) # 第二个参数如果是整数,则为百分比,如果是tuple,则为输出图像的尺寸
 50 plt.imshow(lena_new_sz)
 51 plt.axis('off')
 52 plt.show()
 53 复制代码
 54 5. 保存图像
 55 5.1 保存 matplotlib 画出的图像
 56
 57 该方法适用于保存任何 matplotlib 画出的图像,相当于一个 screencapture。
 58
 59 plt.imshow(lena_new_sz)
 60 plt.axis('off')
 61 plt.savefig('lena_new_sz.png')
 62 5.2 将 array 保存为图像
 63
 64 from scipy import misc
 65 misc.imsave('lena_new_sz.png', lena_new_sz)
 66 5.3 直接保存 array
 67
 68 读取之后还是可以按照前面显示数组的方法对图像进行显示,这种方法完全不会对图像质量造成损失
 69
 70 np.save('lena_new_sz', lena_new_sz) # 会在保存的名字后面自动加上.npy
 71 img = np.load('lena_new_sz.npy') # 读取前面保存的数组
 72
 73
 74
 75
 76 二、PIL
 77 1. 显示图片
 78 from PIL import Image
 79 im = Image.open('lena.png')
 80 im.show()
 81 2. 将 PIL Image 图片转换为 numpy 数组
 82 im_array = np.array(im)
 83 # 也可以用 np.asarray(im) 区别是 np.array() 是深拷贝,np.asarray() 是浅拷贝
 84 3. 保存 PIL 图片
 85 直接调用 Image 类的 save 方法
 86
 87 from PIL import Image
 88 I = Image.open('lena.png')
 89 I.save('new_lena.png')
 90 4. 将 numpy 数组转换为 PIL 图片
 91 这里采用 matplotlib.image 读入图片数组,注意这里读入的数组是 float32 型的,范围是 0-1,而 PIL.Image 数据是 uinit8 型的,范围是0-255,所以要进行转换:
 92
 93 import matplotlib.image as mpimg
 94 from PIL import Image
 95 lena = mpimg.imread('lena.png') # 这里读入的数据是 float32 型的,范围是0-1
 96 im = Image.fromarray(np.uinit8(lena*255))
 97 im.show()
 98  5. RGB 转换为灰度图
 99 from PIL import Image
100 I = Image.open('lena.png')
101 I.show()
102 L = I.convert('L')
103 L.show()
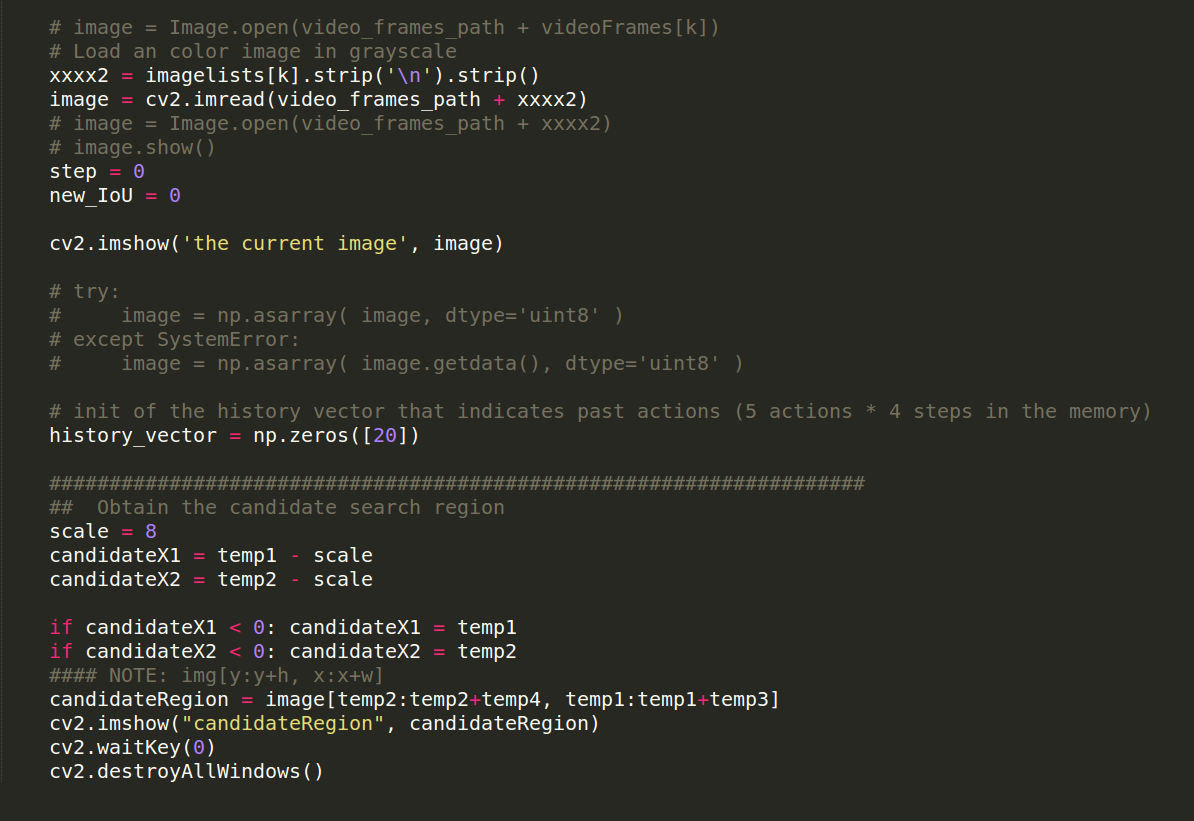
2. TypeError: mat is not a numpy array, neither a scalar
Today I use cv2 to load one image, but it shown me the error like this :
==>> Loading Image Names
==>> Epoch ID is 0
======>> deal with video ID 0 ==>> Basketball
Traceback (most recent call last):
File "./xxx.py", line 160, in <module>
cv2.imshow("candidateRegion", image)
TypeError: mat is not a numpy array, neither a scalar
-------------------------------------------------------------------------------------------------------------------
So, how to solve this issue ?
I found it all depends on which methods you use to load the image.
for example, you may use cv2, PIL, matplotlib or something else.
But, you can only use cv2 for some specific operation later. Here is an example:
Then, this problem can be avoided. Just try to transform the type of the loaded image, i.e. im_array = np.array(im) or directly
utilize the cv2 approach to load the image.
Finally, I want to say that: I love cv2.
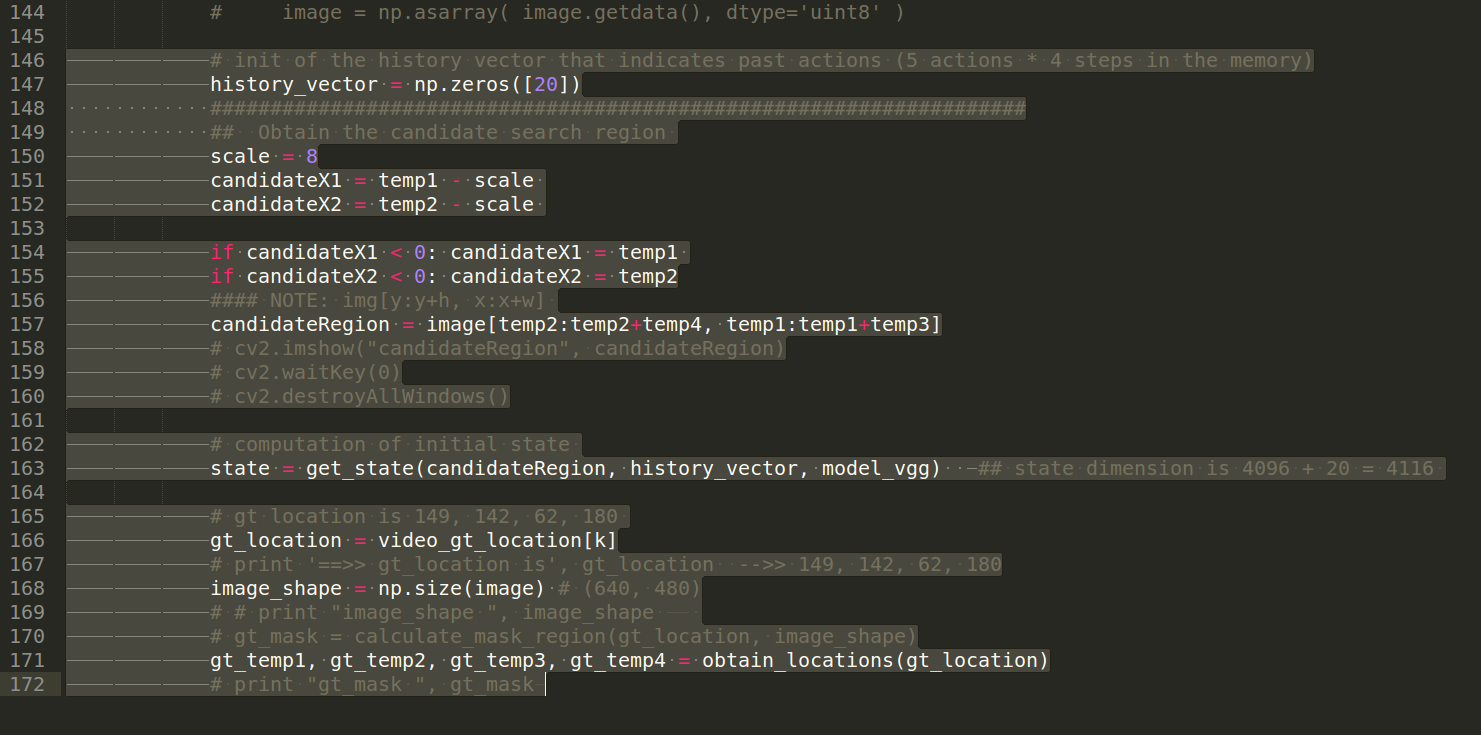
3. When you copy a part of python code from other files, you may find this error:
wangxiao@AHU:~/Documents/files$ python ./run_train_Visual_Tracking_v2.py
File "./run_train_Visual_Tracking_v2.py", line 149
history_vector = np.zeros([20])
^
IndentationError: unindent does not match any outer indentation level
But you sure that: this code do not have any problem ! but it still shown you this fucking error !
This is caused by the alignment issue in python: the mixture usage of "space" and "Tab" !
Just select those code and align it using Tab, first move to most left to reduce the "space" and move it to the right location.
It will be OK, trust me.
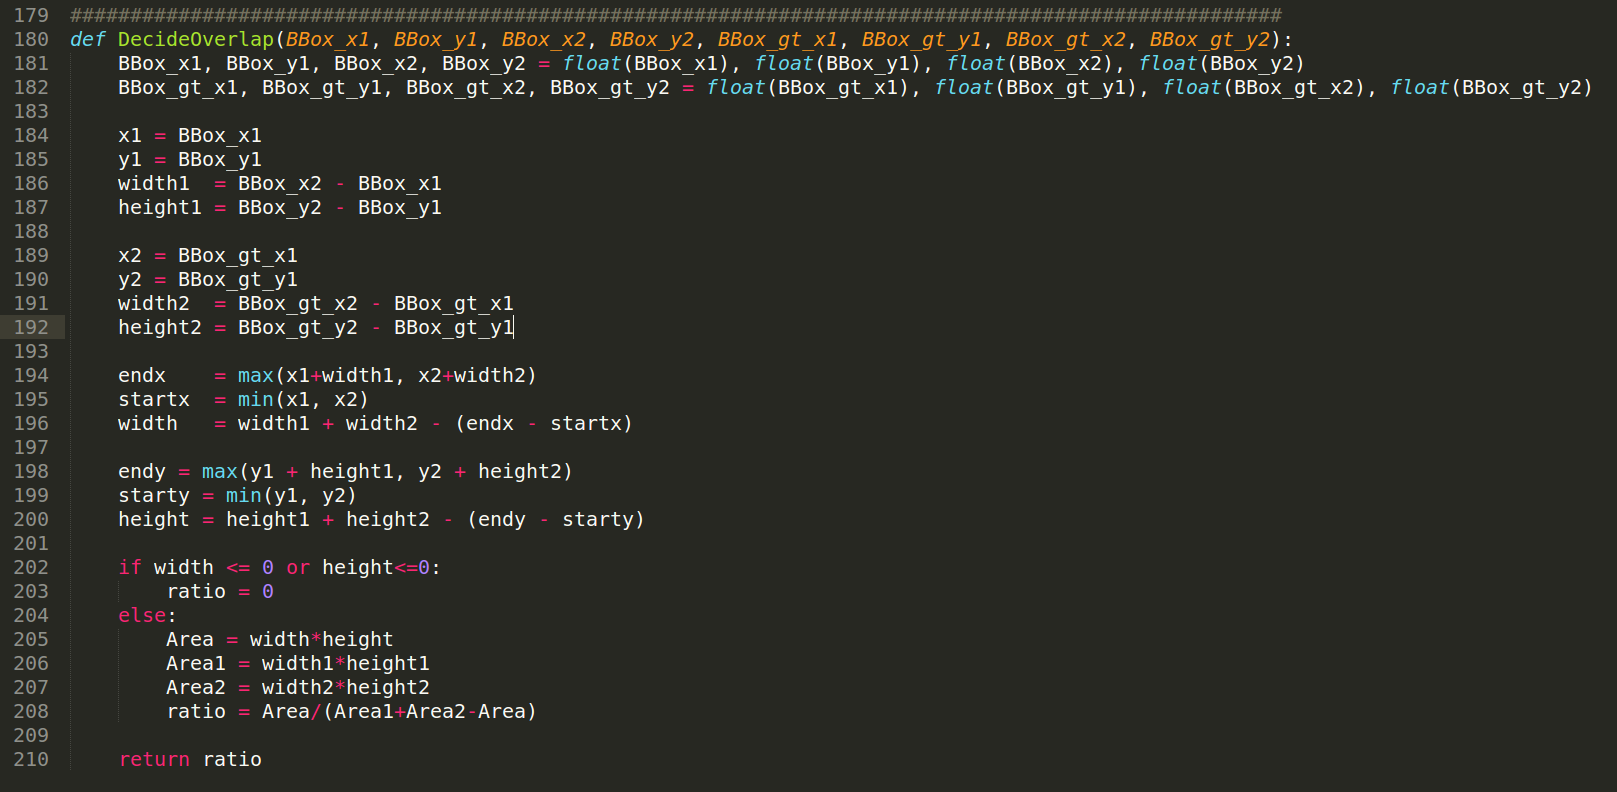
4. Compute IOU of two BBox using python:
5. Shut down the warning of python code.
==>> add these two lines at the beginning of your code.
6. 打开 txt 文档,并且读取对应行的 txt 内容记录:
path = '/path to your txt files /xxx.txt'
txtfiles = [ ]
for line in open(path):
txtfiles.append(line)
## 此时,我们已经将 txt 文件中的内容转移到了 list txtfiles 当中。我们可以通过 txtfiles[i] 的方式来访问某一行的记录。
for example: print(txtfiles[0]) ## 返回第一行的文件记录。
7. Python __future__ 模块 :为什么有时候需要 from __future__ import division?
参考博文:http://blog.csdn.net/langb2014/article/details/53305246
有如下的解释:
- 避免和现有分析import工具混淆,并得到你期望的模块
- 确保2.1之前的版本导入__future__产生运行时异常,因为2.1之前没有这个模块
- 文档化不兼容的改变,通常这些改变会在新版中强制执行。这类文档以可执行的形式组织,通过导入__future__进行可编程式的检查 。
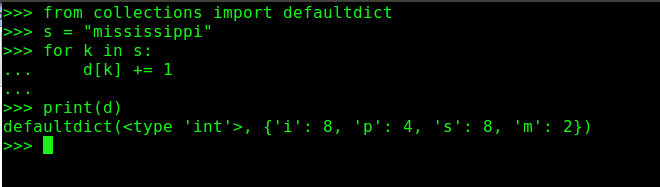
8. How to understand the defaultdict in python ?
As discussed in http://www.jb51.net/article/115578.htm
we can see a example like following:
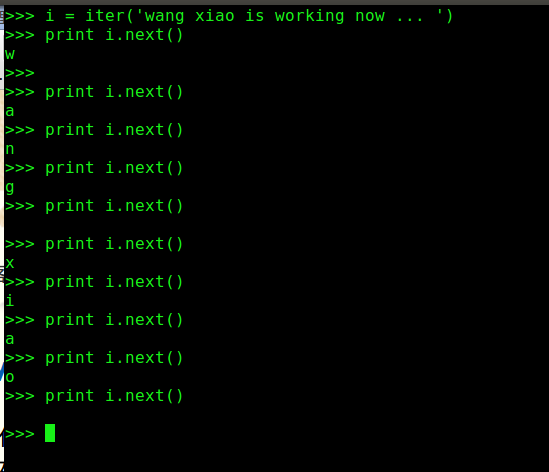
9. the use of iter() in python ?
==>> Python 中的迭代器用起来非常灵巧,不仅可以迭代序列,也可以迭代表现出序列行为的对象,例如字典的键、一个文件的行,等等。迭代器就是有一个next()方法的对象,而不是通过索引来计数。当使用一个循环机制需要下一个项时,调用迭代器的next()方法,迭代完后引发一个StopIteration异常。 但是迭代器只能向后移动、不能回到开始、再次迭代只能创建另一个新的迭代对象。
10. we often see "@property" in python files , what does it used for ?
here are some reference:
1. http://python.jobbole.com/80955/
2. https://www.liaoxuefeng.com/wiki/001374738125095c955c1e6d8bb493182103fac9270762a000/001386820062641f3bcc60a4b164f8d91df476445697b9e000
3. http://www.jb51.net/article/65052.htm
4. http://python.jobbole.com/81967/?utm_source=blog.jobbole.com&utm_medium=relatedPosts
Generally speaking, this function can be used as the followings:
1. 将它作为一个方法的装饰器来使用。
########################################################################
class Person(object):
    """"""

    #----------------------------------------------------------------------
    def __init__(self, first_name, last_name):
        """Constructor"""
        self.first_name = first_name
        self.last_name = last_name

    #----------------------------------------------------------------------
    @property
    def full_name(self):
        """
        Return the full name
        """
        return "%s %s" % (self.first_name, self.last_name)
>>> person = Person("Mike", "Driscoll")
>>> person.full_name
'Mike Driscoll'
>>> person.first_name
'Mike'
>>> person.full_name = "Jackalope"
Traceback (most recent call last):
  File "<string>", line 1, in <fragment>
AttributeError: can't set attribute
因为我们将方法变成了属性,我们可以使用正常的点符号访问它。但是,如果我们试图将该属性设为其他值,我们会引发一个AttributeError错误.
@property广泛应用在类的定义中,可以让调用者写出简短的代码,同时保证对参数进行必要的检查,这样,程序运行时就减少了出错的可能性。
11. ipython notebook error: Unsupported nbformat version 4
==>> error: 2017-08-16 10:28:29.718 [NotebookApp] WARNING | Unreadable Notebook: ~~/refer-master/pyEvalDemo.ipynb Unsupported nbformat version 4
    sudo apt-get install ipython notebook
    sudo pip install notebook --upgrade
12. python2 与python3 版本之间的切换
设置优先级
sudo update-alternatives --install /usr/bin/python python /usr/bin/python2 100
sudo update-alternatives --install /usr/bin/python python /usr/bin/python3 150
13. install python 3.6 and pip3 on Ubuntu system.
reference blog: https://www.rosehosting.com/blog/how-to-install-python-3-6-on-ubuntu-16-04/
Python 2.7 and Python 3.5 are installed on Ubuntu 16.04 by default. In this tutorial, we will guide you through steps of installing the latest Python 3.6 on Ubuntu 16.04.

1. Login via SSH and update all installed packages
First of all, login to your Ubuntu 16.04 VPS via SSH as user root

ssh root@IP_Address -p Port_number
and update all installed packages

2. Check the currently installed version of Python
To check the currently installed version of Python, execute the following command

# python -V
Python 2.7.12
To check the Python 3 version, use the following command

# python3 -V
Python 3.5.2
There are two methods of installing Python 3.6 on an Ubuntu 16.04 VPS, from source, and from PPA.

3. Install Python 3.6 on Ubuntu 16.04, from source
In order to install the latest Python 3.6 release for Linux/UNIX, go to their official website and download its source code to your server. At the moment of writing this article, it is version 3.6.3

cd /opt
wget https://www.python.org/ftp/python/3.6.3/Python-3.6.3.tgz
and unpack the downloaded archive

tar -xvf Python-3.6.3.tgz
4. Method 1: Run the “configure” script
Change the current working directory and run the ‘configure’ script

cd Python-3.6.3
./configure
If there are no errors, run the following commands to complete the installation process of Python 3.6

make
make install
If you get the following error message

zipimport.ZipImportError: can't decompress data; zlib not available
install the ‘zlib1g-dev’ package

apt-get install zlib1g-dev
are run ‘make’ and ‘make install’ again.

That’s all. Python 3.6 should be successfully installed at this point. You can check this with the following command

# python3.6 -V
Python 3.6.3
5. Method 2: Install Python 3.6 from PPA
You can also install Python 3.6 from J Fernyhough’s Personal Package Archive (PPA).
Install the following requirements

apt-get install software-properties-common python-software-properties
Run the following command to add the PPA

# add-apt-repository ppa:jonathonf/python-3.6
Press [ENTER] to continue or ctrl-c to cancel adding it
and press enter to continue.

6. Update the repositories
update the repositories

apt-get update
7. Install Python version 3.6 on Ubuntu 16.04

and finally, install Python version 3.6

apt-get install python3.6
7. Verify Python 3.6.3 installation
Once it is installed, you can verify the installed version by executing the following command

# python3.6 -V
Python 3.6.3
To learn more about Python version 3.6 check their official release notes.
install pip3:
wget --no-check-certificate  https://pypi.python.org/packages/source/p/pip/pip-8.0.2.tar.gz#md5=3a73c4188f8dbad6a1e6f6d44d117eeb

tar -zxvf pip-8.0.2.tar.gz

cd pip-8.0.2

python3 setup.py build

python3 setup.py install
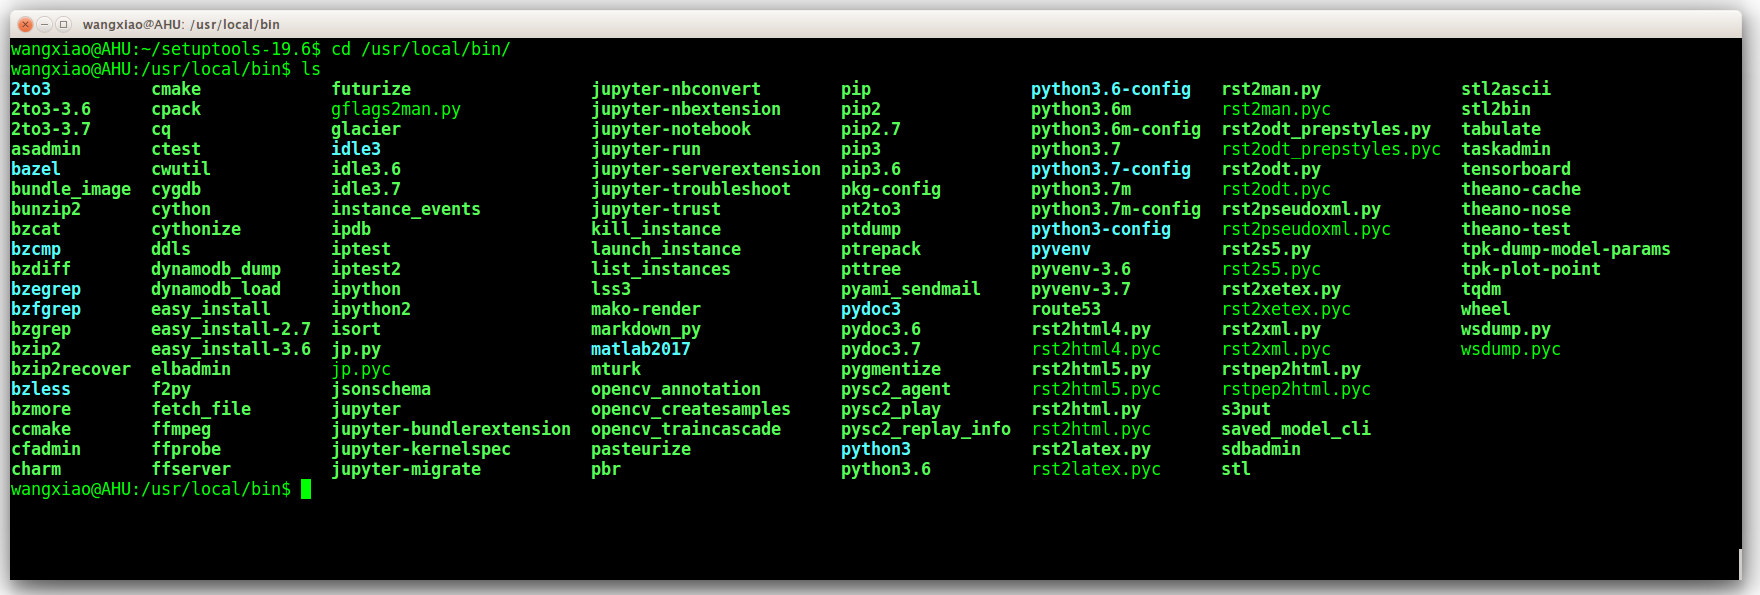
Then you can found the pip3 operation in the /usr/local/bin/ :
14. nvcc -c -o crop_and_resize_kernel.cu.o crop_and_resize_kernel.cu -x cu -Xcompiler -fPIC -arch=[arch]
The program 'nvcc' is currently not installed. You can install it by typing:
sudo apt-get install nvidia-cuda-toolkit
However, I have installed the cuda tools successfully. This issue can be solved by export path to the terminal according to: https://devtalk.nvidia.com/default/topic/995277/cuda-8-0-toolkit-install-nvcc-not-found-ubuntu-16-04/?offset=19
export PATH=/usr/local/cuda-8.0/bin:$PATH
export LD_LIBRARY_PATH=/usr/local/cuda-8.0/lib64:$LD_LIBRARY_PATH
15. cffi.error.VerificationError: CompileError: command 'gcc' failed with exit status 1
 1 creating media/wangxiao/b8efbc67-7ea5-476d-9631-70da75f84e2d/py-MDNet-master-RoIAlign-V2/roialign/roi_align/src
 2 gcc -pthread -Wno-unused-result -Wsign-compare -DNDEBUG -g -fwrapv -O3 -Wall -Wstrict-prototypes -fPIC -DWITH_CUDA -I/usr/local/lib/python3.6/site-packages/torch/utils/ffi/../../lib/include -I/usr/local/lib/python3.6/site-packages/torch/utils/ffi/../../lib/include/TH -I/usr/local/lib/python3.6/site-packages/torch/utils/ffi/../../lib/include/THC -I/usr/local/cuda/include -I/usr/local/include/python3.6m -c _crop_and_resize.c -o ./_crop_and_resize.o -std=c99 -fopenmp -std=c99
 3 gcc -pthread -Wno-unused-result -Wsign-compare -DNDEBUG -g -fwrapv -O3 -Wall -Wstrict-prototypes -fPIC -DWITH_CUDA -I/usr/local/lib/python3.6/site-packages/torch/utils/ffi/../../lib/include -I/usr/local/lib/python3.6/site-packages/torch/utils/ffi/../../lib/include/TH -I/usr/local/lib/python3.6/site-packages/torch/utils/ffi/../../lib/include/THC -I/usr/local/cuda/include -I/usr/local/include/python3.6m -c /media/wangxiao/b8efbc67-7ea5-476d-9631-70da75f84e2d/py-MDNet-master-RoIAlign-V2/roialign/roi_align/src/crop_and_resize.c -o ./media/wangxiao/b8efbc67-7ea5-476d-9631-70da75f84e2d/py-MDNet-master-RoIAlign-V2/roialign/roi_align/src/crop_and_resize.o -std=c99 -fopenmp -std=c99
 4 /media/wangxiao/b8efbc67-7ea5-476d-9631-70da75f84e2d/py-MDNet-master-RoIAlign-V2/roialign/roi_align/src/crop_and_resize.c: In function ‘crop_and_resize_forward’:
 5 /media/wangxiao/b8efbc67-7ea5-476d-9631-70da75f84e2d/py-MDNet-master-RoIAlign-V2/roialign/roi_align/src/crop_and_resize.c:124:33: error: dereferencing pointer to incomplete type
 6 const int batch_size = image->size[0];
 7 ^
 8 /media/wangxiao/b8efbc67-7ea5-476d-9631-70da75f84e2d/py-MDNet-master-RoIAlign-V2/roialign/roi_align/src/crop_and_resize.c:125:28: error: dereferencing pointer to incomplete type
 9 const int depth = image->size[1];
10 ^
11 /media/wangxiao/b8efbc67-7ea5-476d-9631-70da75f84e2d/py-MDNet-master-RoIAlign-V2/roialign/roi_align/src/crop_and_resize.c:126:35: error: dereferencing pointer to incomplete type
12 const int image_height = image->size[2];
13 ^
14 /media/wangxiao/b8efbc67-7ea5-476d-9631-70da75f84e2d/py-MDNet-master-RoIAlign-V2/roialign/roi_align/src/crop_and_resize.c:127:34: error: dereferencing pointer to incomplete type
15 const int image_width = image->size[3];
16 ^
17 /media/wangxiao/b8efbc67-7ea5-476d-9631-70da75f84e2d/py-MDNet-master-RoIAlign-V2/roialign/roi_align/src/crop_and_resize.c:129:32: error: dereferencing pointer to incomplete type
18 const int num_boxes = boxes->size[0];
19 ^
20 /media/wangxiao/b8efbc67-7ea5-476d-9631-70da75f84e2d/py-MDNet-master-RoIAlign-V2/roialign/roi_align/src/crop_and_resize.c: In function ‘crop_and_resize_backward’:
21 /media/wangxiao/b8efbc67-7ea5-476d-9631-70da75f84e2d/py-MDNet-master-RoIAlign-V2/roialign/roi_align/src/crop_and_resize.c:165:39: error: dereferencing pointer to incomplete type
22 const int batch_size = grads_image->size[0];
23 ^
24 /media/wangxiao/b8efbc67-7ea5-476d-9631-70da75f84e2d/py-MDNet-master-RoIAlign-V2/roialign/roi_align/src/crop_and_resize.c:166:34: error: dereferencing pointer to incomplete type
25 const int depth = grads_image->size[1];
26 ^
27 /media/wangxiao/b8efbc67-7ea5-476d-9631-70da75f84e2d/py-MDNet-master-RoIAlign-V2/roialign/roi_align/src/crop_and_resize.c:167:41: error: dereferencing pointer to incomplete type
28 const int image_height = grads_image->size[2];
29 ^
30 /media/wangxiao/b8efbc67-7ea5-476d-9631-70da75f84e2d/py-MDNet-master-RoIAlign-V2/roialign/roi_align/src/crop_and_resize.c:168:40: error: dereferencing pointer to incomplete type
31 const int image_width = grads_image->size[3];
32 ^
33 /media/wangxiao/b8efbc67-7ea5-476d-9631-70da75f84e2d/py-MDNet-master-RoIAlign-V2/roialign/roi_align/src/crop_and_resize.c:170:32: error: dereferencing pointer to incomplete type
34 const int num_boxes = grads->size[0];
35 ^
36 /media/wangxiao/b8efbc67-7ea5-476d-9631-70da75f84e2d/py-MDNet-master-RoIAlign-V2/roialign/roi_align/src/crop_and_resize.c:171:34: error: dereferencing pointer to incomplete type
37 const int crop_height = grads->size[2];
38 ^
39 /media/wangxiao/b8efbc67-7ea5-476d-9631-70da75f84e2d/py-MDNet-master-RoIAlign-V2/roialign/roi_align/src/crop_and_resize.c:172:33: error: dereferencing pointer to incomplete type
40 const int crop_width = grads->size[3];
41 ^
42 Traceback (most recent call last):
43 File "/usr/local/lib/python3.6/distutils/unixccompiler.py", line 118, in _compile
44 extra_postargs)
45 File "/usr/local/lib/python3.6/distutils/ccompiler.py", line 909, in spawn
46 spawn(cmd, dry_run=self.dry_run)
47 File "/usr/local/lib/python3.6/distutils/spawn.py", line 36, in spawn
48 _spawn_posix(cmd, search_path, dry_run=dry_run)
49 File "/usr/local/lib/python3.6/distutils/spawn.py", line 159, in _spawn_posix
50 % (cmd, exit_status))
51 distutils.errors.DistutilsExecError: command 'gcc' failed with exit status 1
52
53 During handling of the above exception, another exception occurred:
54
55 Traceback (most recent call last):
56 File "/usr/local/lib/python3.6/site-packages/cffi/ffiplatform.py", line 51, in _build
57 dist.run_command('build_ext')
58 File "/usr/local/lib/python3.6/distutils/dist.py", line 974, in run_command
59 cmd_obj.run()
60 File "/usr/local/lib/python3.6/distutils/command/build_ext.py", line 339, in run
61 self.build_extensions()
62 File "/usr/local/lib/python3.6/distutils/command/build_ext.py", line 448, in build_extensions
63 self._build_extensions_serial()
64 File "/usr/local/lib/python3.6/distutils/command/build_ext.py", line 473, in _build_extensions_serial
65 self.build_extension(ext)
66 File "/usr/local/lib/python3.6/distutils/command/build_ext.py", line 533, in build_extension
67 depends=ext.depends)
68 File "/usr/local/lib/python3.6/distutils/ccompiler.py", line 574, in compile
69 self._compile(obj, src, ext, cc_args, extra_postargs, pp_opts)
70 File "/usr/local/lib/python3.6/distutils/unixccompiler.py", line 120, in _compile
71 raise CompileError(msg)
72 distutils.errors.CompileError: command 'gcc' failed with exit status 1
73
74 During handling of the above exception, another exception occurred:
75
76 Traceback (most recent call last):
77 File "build.py", line 40, in <module>
78 ffi.build()
79 File "/usr/local/lib/python3.6/site-packages/torch/utils/ffi/__init__.py", line 189, in build
80 _build_extension(ffi, cffi_wrapper_name, target_dir, verbose)
81 File "/usr/local/lib/python3.6/site-packages/torch/utils/ffi/__init__.py", line 111, in _build_extension
82 outfile = ffi.compile(tmpdir=tmpdir, verbose=verbose, target=libname)
83 File "/usr/local/lib/python3.6/site-packages/cffi/api.py", line 697, in compile
84 compiler_verbose=verbose, debug=debug, **kwds)
85 File "/usr/local/lib/python3.6/site-packages/cffi/recompiler.py", line 1520, in recompile
86 compiler_verbose, debug)
87 File "/usr/local/lib/python3.6/site-packages/cffi/ffiplatform.py", line 22, in compile
88 outputfilename = _build(tmpdir, ext, compiler_verbose, debug)
89 File "/usr/local/lib/python3.6/site-packages/cffi/ffiplatform.py", line 58, in _build
90 raise VerificationError('%s: %s' % (e.__class__.__name__, e))
91 cffi.error.VerificationError: CompileError: command 'gcc' failed with exit status 1
According to the blog: https://github.com/jwyang/faster-rcnn.pytorch/issues/235
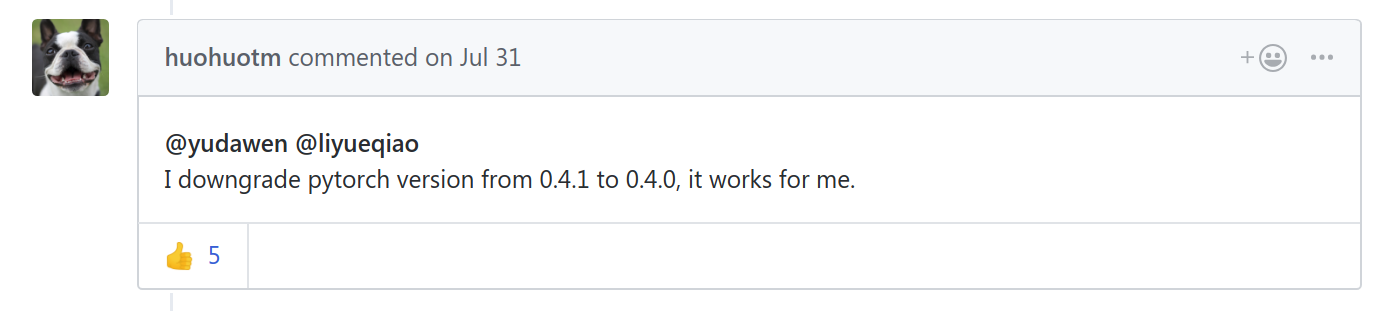
we need to install pytorch 0.4.0 not 0.4.1. However, my current version is pytorch 0.4.1.
16. ImportError: /media/wangxiao/b8efbc67-7ea5-476d-9631-70da75f84e2d/reference_code/pytorch-mask-rcnn/pycocotools/_mask.so: undefined symbol: _Py_ZeroStruct
wangxiao@AHU:/media/wangxiao/b8efbc67-7ea5-476d-9631-70da75f84e2d/reference_code/pytorch-mask-rcnn$ python3 demo.py
Traceback (most recent call last):
File "demo.py", line 10, in <module>
import coco
File "/media/wangxiao/b8efbc67-7ea5-476d-9631-70da75f84e2d/reference_code/pytorch-mask-rcnn/coco.py", line 40, in <module>
from pycocotools.coco import COCO
File "/media/wangxiao/b8efbc67-7ea5-476d-9631-70da75f84e2d/reference_code/pytorch-mask-rcnn/pycocotools/coco.py", line 55, in <module>
from . import mask as maskUtils
File "/media/wangxiao/b8efbc67-7ea5-476d-9631-70da75f84e2d/reference_code/pytorch-mask-rcnn/pycocotools/mask.py", line 3, in <module>
import pycocotools._mask as _mask
ImportError: /media/wangxiao/b8efbc67-7ea5-476d-9631-70da75f84e2d/reference_code/pytorch-mask-rcnn/pycocotools/_mask.so: undefined symbol: _Py_ZeroStruct
==>> According to the blog: https://blog.csdn.net/u011636567/article/details/78201106, we need to install the Cython under the Python3 envionment, because I installed this software before under Python 2.7.
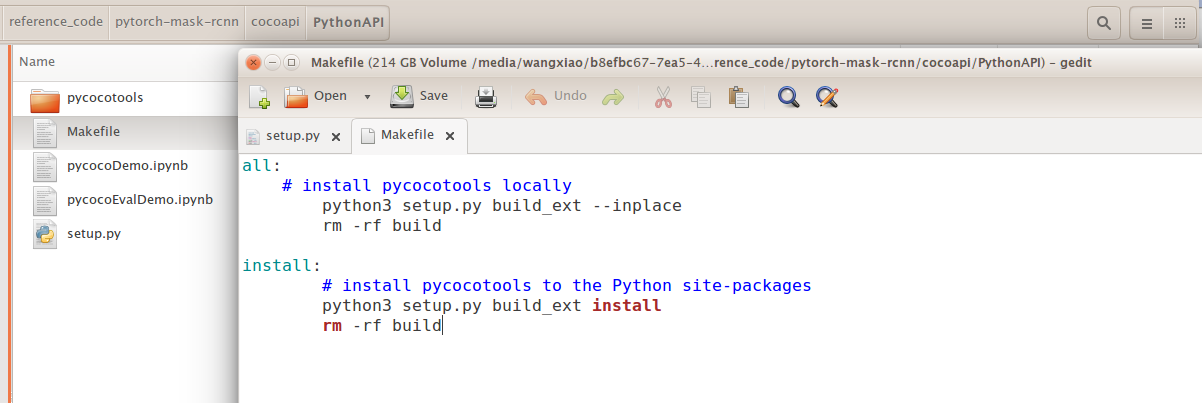
==>> However, this is maybe one of the reason caused this issue, but not mine. Actually, i need to modify the Makefile:
all:
# install pycocotools locally
python3 setup.py build_ext --inplace
rm -rf build

install:
# install pycocotools to the Python site-packages
python3 setup.py build_ext install
rm -rf build
17. It shown me the following error, but when I re-running my code, it can jump it, but it still occur sometimes:
Exception RuntimeError: RuntimeError('main thread is not in main loop',) in <bound method PhotoImage.__del__ of <Tkinter.PhotoImage instance at 0x7f0edf4e5758>> ignored
Tcl_AsyncDelete: async handler deleted by the wrong thread
Aborted (core dumped)
18. Could not fetch URL https://pypi.python.org/simple/numpy/: There was a problem confirming the ssl certificate: Can't connect to HTTPS URL because the SSL module is not available. - skipping
A18: https://blog.csdn.net/zr1076311296/article/details/75136612
1.安装ssl
sudo apt-get install openssl
sudo apt-get install libssl-dev
2. 修改Moudles/Setup (该目录在python的解压目录下) 直接将这一段拷贝到该文件的最后即可!亲测可行!!!
vim Modules/Setup
#修改结果如下:
# Socket module helper for socket(2)
_socket socketmodule.c timemodule.c
# Socket module helper for SSL support; you must comment out the other
# socket line above, and possibly edit the SSL variable:
#SSL=/usr/local/ssl
_ssl _ssl.c \
-DUSE_SSL -I$(SSL)/include -I$(SSL)/include/openssl \
-L$(SSL)/lib -lssl -lcrypto
3.重新安装一次
./configure --prefix=/usr/local/python
make
sudo -H make install
4.python3
>>>import ssl #检测成功!
>>>
19. 安装并指定 Ubuntu 默认的 Python 版本:
Reference:https://blog.csdn.net/shenlongshi/article/details/79630940
1. 安装 Python3.6
sudo add-apt-repository ppa:deadsnakes/ppa
sudo apt-get update
sudo apt-get install python3.6
2. 列出系统当前存在的python版本及python默认的版本
ls -l /usr/bin | grep python
3. 删除原有的 python 或者 python3 的链接:
sudo rm /usr/bin/python
4. 建立python到python3.6.4新的软链接
sudo ln -s /usr/bin/python3.6 /usr/bin/python
5. 测试系统默认python命令已经指向python3.6.4
python -V
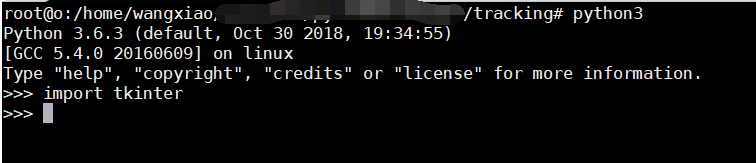
20. ModuleNotFoundError: No module named '_tkinter'
Traceback (most recent call last):
File "run_tracker_OTB100_p1.py", line 8, in <module>
import matplotlib.pyplot as plt
File "/usr/local/lib/python3.6/site-packages/matplotlib/pyplot.py", line 2374, in <module>
switch_backend(rcParams["backend"])
File "/usr/local/lib/python3.6/site-packages/matplotlib/pyplot.py", line 207, in switch_backend
backend_mod = importlib.import_module(backend_name)
File "/usr/local/lib/python3.6/importlib/__init__.py", line 126, in import_module
return _bootstrap._gcd_import(name[level:], package, level)
File "/usr/local/lib/python3.6/site-packages/matplotlib/backends/backend_tkagg.py", line 1, in <module>
from . import _backend_tk
File "/usr/local/lib/python3.6/site-packages/matplotlib/backends/_backend_tk.py", line 5, in <module>
import tkinter as Tk
File "/usr/local/lib/python3.6/tkinter/__init__.py", line 36, in <module>
import _tkinter # If this fails your Python may not be configured for Tk
ModuleNotFoundError: No module named '_tkinter'
A20:
1. 对于 Python3.6 来讲,执行这个命令来安装这个软件:
sudo apt-get install python3.6-tk
2. 重新安装 Python3.6
3. 检查是否成功
Q21. Scripts to run the MDNet on benchmarks ans save the results into txt files:
 1 if __name__ == "__main__":
 2
 3     videos = ['Basketball', 'Biker', 'Bird1','Matrix','Diving','Girl2','Bird2','BlurBody','BlurCar1','BlurCar2','MotorRolling','Jump','CarScale',
 4               'BlurCar4','BlurFace','BlurOwl','Board','Bolt','Bolt2','Twinnings','Vase', 'Walking','Walking2','Woman', 'BlurCar3','David2','Freeman3',
 5               'Box','Boy','Car1','Car2','Car24','Car4','CarDark','ClifBar','Coke','Couple','Coupon','Crossing','Crowds','Dancer','Dancer2','David',
 6               'David3','Deer','Dog','Dog1','Doll','DragonBaby','Dudek','FaceOcc1','FaceOcc2','Fish','FleetFace','Football','Football1','Freeman1',
 7               'Freeman4','Girl','Gym','Human2','Human3','Human4','Human5','Human6','Human7','Human8','Human9','Ironman','Jogging-1','Jogging-2','Jumping',
 8               'KiteSurf','Lemming','Liquor','Man','Mhyang','MountainBike','Panda','RedTeam','Rubik','Shaking','Singer1','Singer2','Skater','Skater2',
 9               'Skating1','Skating2-1','Skating2-2','Skiing','Soccer','Subway','Surfer','Suv','Sylvester','Tiger1','Tiger2','Toy','Trans','Trellis']
10
11     # videos = ['ball','bicycle','bolt','david','diving','drunk','fernando','fish1','fish2','gymnastics','hand1','hand2','jogging','motocross','polarbear',
12     #             'skating','sphere','sunshade','surfing','torus','trellis','tunnel', 'woman','skating','car','basketball']
13
14     # videos = ['bag','ball1','ball2','basketball','birds1','birds2','blanket','bmx','bolt1','bolt2','book','butterfly','car1','car2',
15     #           'crossing','dinosaur','fernando','fish1','fish2','fish3','fish4','girl','glove','godfather','graduate','gymnastics1','gymnastics2',
16     #           'gymnastics3','gymnastics4','hand','handball1','handball2','helicopter','iceskater1','iceskater2','leaves','marching','matrix',
17     #           'motocross1','motocross2','nature','octopus','pedestrian1','pedestrian2','rabbit','racing','road','shaking','sheep','singer1',
18     #           'singer2','singer3','soccer1','soccer2','soldier','sphere','tiger','traffic','tunnel','wiper']
19
20
21     for vid in range(len(videos)) :
22         videoname = videos[vid]
23         seq_home = '/home/wangxiao/data/OTB100'
24         save_home = '../result_fig'
25         result_home = './pyMDNetOTB100_v1'
26
27         resultFiles = os.listdir(result_home)
28
29         if videoname in resultFiles:
30             vid = vid + 1
31         else:
32             seq_name = videoname
33             img_dir = os.path.join(seq_home, seq_name, 'img')
34             gt_path = os.path.join(seq_home, seq_name, 'groundtruth_rect_new.txt')
35
36             print("==>> deal with video: ", seq_name)
37
38             img_list = os.listdir(img_dir)
39             img_list.sort()
40             img_list = [os.path.join(img_dir,x) for x in img_list]
41
42             gt = np.loadtxt(gt_path, delimiter=',')
43
44             init_bbox = gt[0]
45
46             savefig_dir = os.path.join(save_home,seq_name)
47             result_dir = os.path.join(result_home,seq_name)
48             if not os.path.exists(result_dir):
49                 os.makedirs(result_dir)
50             result_path = os.path.join(result_dir,'result.json')
51
52             # Run tracker
53             result, result_bb, fps = run_mdnet(img_list, init_bbox, videoname, gt=gt)
54
55             # Save result
56             res = {}
57             res['res'] = result_bb.round().tolist()
58             res['type'] = 'rect'
59             res['fps'] = fps
60             json.dump(res, open(result_path, 'w'), indent=2)
## Save result into txt:
txtName = videoname + '_result.txt'
fid = open(result_home+txtName, 'w')
for iidex in range(len(result_bb)):
line = result_bb[iidex]
fid.write(line)
fid.write('\n')
fid.close()
==